Christophe Riccio posted on his twitter feed some pictures comparing the quality of different texture compression formats, including the PowerVR’s native compression format, PVRTC2. In the light of his tests, it seems to me the new compression is a lot better than before (unfortunately they are not compared).
Last year at my work, in a context of trying to reduce loading time, memory consumption and application size, we gave a try at PVRTC and in our use case it was a clear no go. The quality was so badly impacted that the texture size we’d need for the artists to be happy was well beyond the weight of a PNG of equivalent quality. In the end we settled with WebP.
Here it is interesting to see that even at 2bpp, PVRTC2 seems to retain a lot of detail and texture. The edge tend to be muddy but this is still very good for the price.
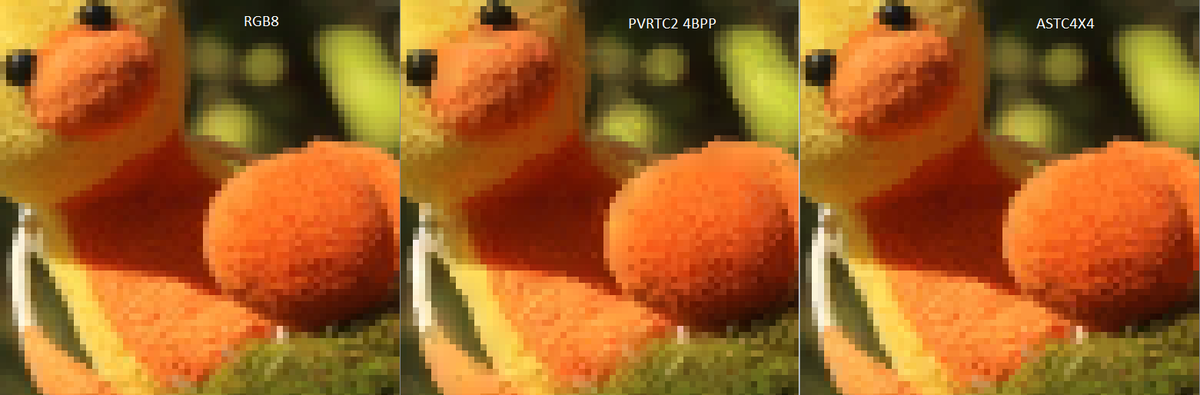
RGB8 vs PVRTC2 4BPP vs ASTC4X4 “max compression quality” pic.twitter.com/tOagdry7NQ
— Christophe (@g_truc) August 30, 2015
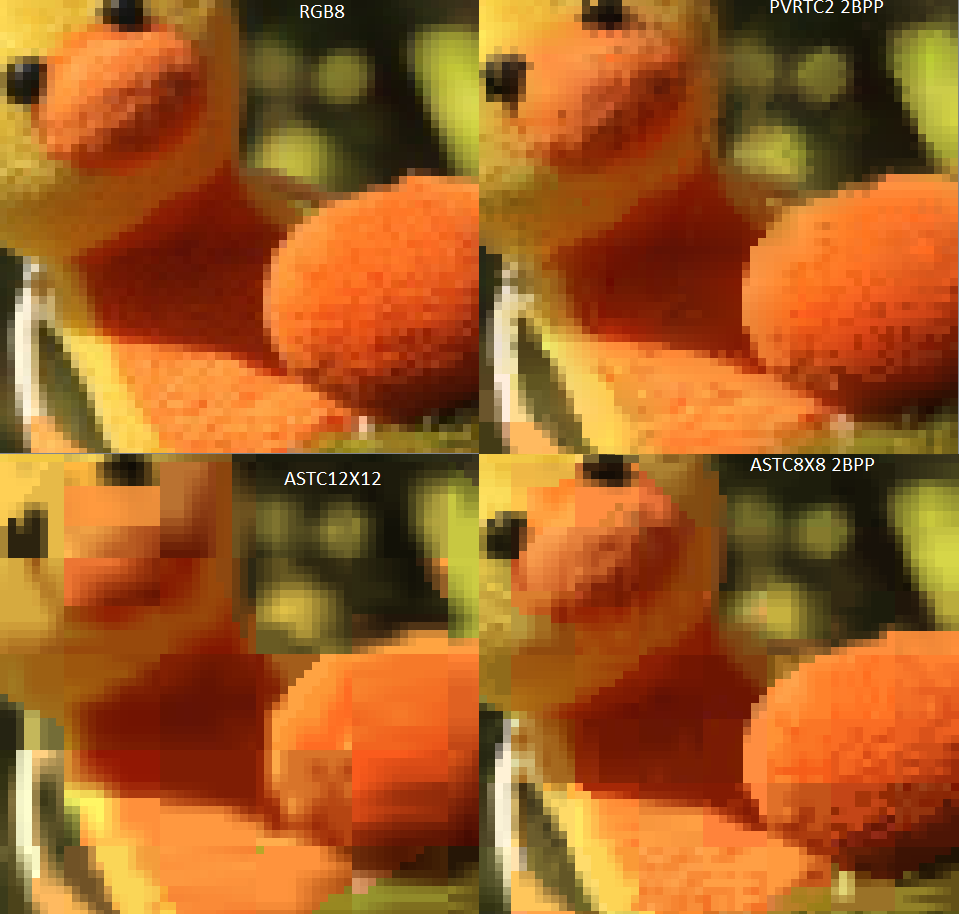
RGB8 vs PVRTC2 2BPP vs ASTC8X8 (2BPP) vs ASTC12X12 “max compression quality” pic.twitter.com/5v3wPTESEC
— Christophe (@g_truc) August 30, 2015